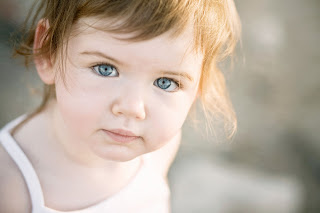
Today, we have been learning about the many different ways that we can adjust different aspect of an image in Photoshop such as:
Levels
Curves
Colour Balance
Red-Eye Removal
Colour Replacement
Match Colour
Hue & Saturation
Black and White
Photo-Filter
Filter Gallery
Fade
Level Adjustment.
The purpose of this exercise is to adjust the shadows, mid-tones and highlights to give a better tonal balance to the final image.
The command for this is: IMAGES - ADJUSTMENTS - LEVELS
Tone-Curve Adjustment
A similar adjustment of the tonal values only this time using
the tone-curve instead of adjusting the levels.
IMAGES - ADJUSTMENTS- TONE CURVE
In the above images, I have increased the contrast using the tone-curve.
A slight adjustment as in the second image
and a very heavy adjustment as can be seen in the silver image above.
The same has been done for the images above.
The original image has very flat and neutral colour-tones.
I have adjusted the 2nd image to give brighter and more contrasting colours.
For the image above, I have pushed the contrast too far to give this cartoon-like effect.
Colour Balance
The Colour-Wheel.
This colour wheel is used when trying to adjust a colour cast.
The opposite colour to the colour cast is applied to the image to eliminate the colour cast.
For example, if an image had a red colour cast, I would apply the opposite colour from the colour wheel in this case, cyan and this would neutralise the colour cast.
This is done by using the command: IMAGE - ADJUSTMENTS - COLOUR BALANCE.
This process must be applied to the shadows, mid-tones and highlights of an image.
Colour Casts.
Sometimes, an image will have what is known as a colour cast. For example, if the camera's white-balance was accidentally set to tungsten when the photographer was shooting outdoors in daytime sunlight. This would cause the image to have a blue cast.
 |
 |
 |
 |
Red-Eye Removal / Replace Colour
Red-Eye removal using the Red-Eye removal tool.
Sometimes this tool works very well as in this case with the rabbits. however, it is not always accurate enough so another tool is required.
Replace Colour Tool
The original image of the red car has been adjusted using the colour replacement tool to
change the car to a light-blue colour.
The original image of the red flower has been adjusted
Hue and Saturation
The above image has been desaturated. not to the point where the image has become black and white but enough to dramatically alter the mood of the image.
This is do by using the command: IMAGE - ADJUSTMENTS - SATURATION.
Black and White.
It is possible to desaturate an image (to remove all the colour and turn it to black and white) by using the command: IMAGES - ADJUSTMENTS - BLACK AND WHITE. Using this command allows you to control the tonal values of the image.
I have altered the colour image above using the preset settings within the command
IMAGES - ADJUSTMENTS -BLACK AND WHITE
In this command, I used 2 separate presets to create the images as seen above.
I started with the colour image above and by using the different colour sliders within the black and white adjustment, I was able to create these three dramatically different black and white images.


No comments:
Post a Comment